

Welcome to the first in a series of posts aiming to help you get set up to develop for and on your SteamDeck, retracing the steps that I had to do to get the deck into a position where I could compile and run my NES emulator on it.
This first post is going to focus on some initial setup that will let us ssh onto the deck from our primary development PC (which in my case is a windows PC, but it’s all the same for ssh and I give Linux instructions too)
For the first few steps before we have ssh, you’re going to need to be working on-device, either with a bluetooth keyboard plugged in, or using the built-in virtual keyboard that can be brought up by pressing [Steam]+[X]; when I first did this I was using the virtual keyboard.
The virtual keyboard provided on deck, combined with the track-pads, is actually pretty good for typing in small amounts of text, but there’s no denying that the lack of screen real-estate gets tricky fast when half of the screen is the keyboard, so as quickly as possible we want to get ssh set-up so that all further setup commands can be input from our PC via an ssh’d-in terminal.
Without further preamble then, let’s get started!
Getting to Desktop Mode on the Deck
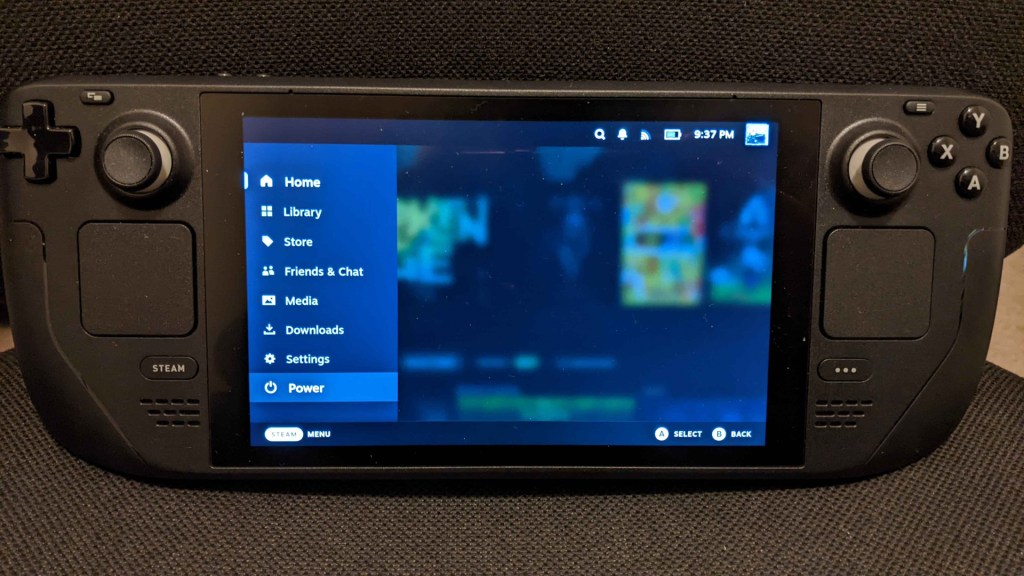
You probably already know this but I’m going to include it for good measure. To get to the desktop on the Steam Deck:
Press the Steam button to bring up the menu
Select ‘Power’ (as you would to e.g. sleep or shutdown)
From the power menu select ‘Switch to Desktop”
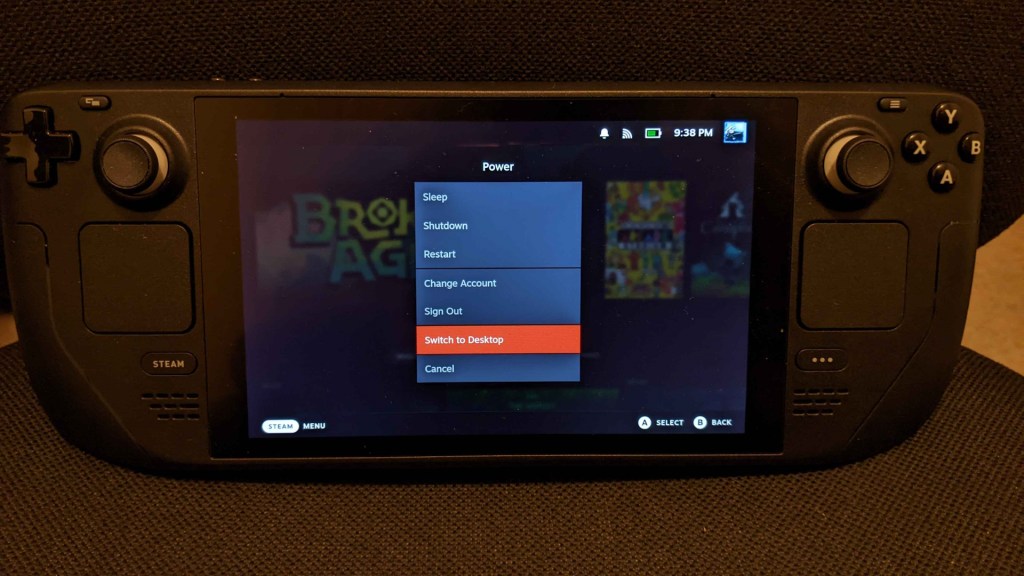
This will drop you out to the SteamOS desktop
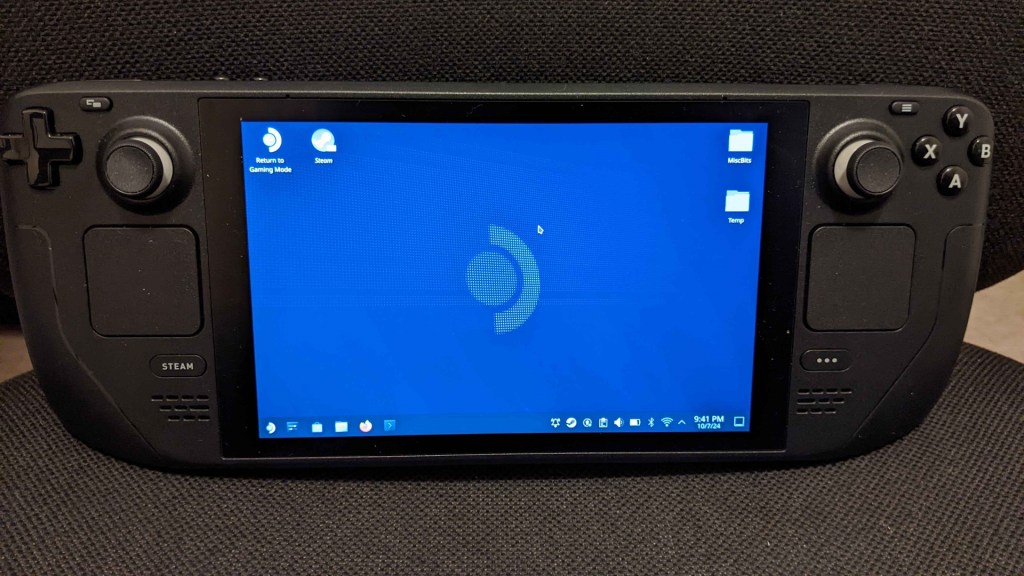
From here it’s basically a normal linux PC desktop, and you will be using the ‘Konsole’ terminal/command-console for running initial setup commands, until we can swap over to ssh for the rest.
Setting a password on the Deck
The first thing we’re going to want to do is set-up a password on the deck.
- Open up a Konsole and type “passwd” (without quotation marks)
- If you already have a password then it will ask you to enter it, and you can just skip out of this stage instead.
- Otherwise it will ask you to specify a new password and then confirm it.
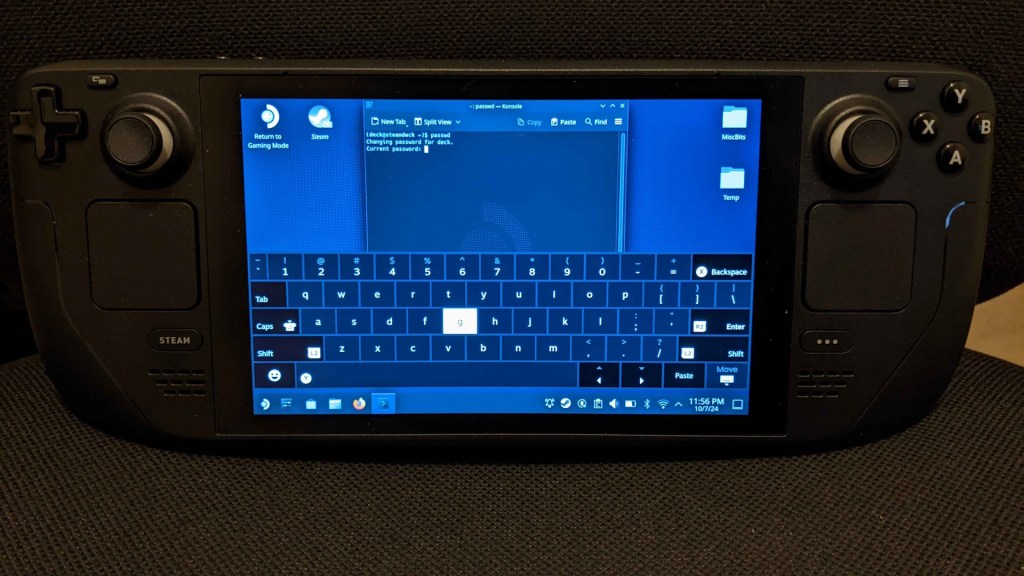
(I already had a password set so it prompts me to ‘change’ rather than set)
Make sure you remember this password, you’re going to need it for using sudo commands and for connecting via ssh (at least until we set up keys).
Enabling the Open-SSH Daemon
Once that’s done, we want to enable the Open-SSH daemon and have it automatically startup when the deck boots so that you don’t need to launch it each time.
Open a Konsole and enter the following command:
sudo systemctl enable sshd
This enables sshd to start up automatically on system boot, and will be there whether you’re in deck-mode or desktop mode.
This is actually quite useful as once you’re primarily developing from your PC you don’t even need to drop to desktop mode on the deck to continue working, and if you’ve added your in-progress app/game to Steam as a local-game you can just launch it through the Steam UI each time (more on that in a later post).
Now enter the following command:
sudo systemctl start sshd
This actually starts it for the first time.
At this point, SSH should be set-up and ready to go on the deck. You could restart the deck and it should even start up the daemon automatically.
Test the SSH connection:
The deck SHOULD be findable with “deck@steamdeck” as an address, but that doesn’t seem to always be reliable (e.g. I think the @steamdeck alias seems to go missing when it goes to sleep if idle), so for good measure we’ll also cover how to get the ip of the deck, and ssh in with that.
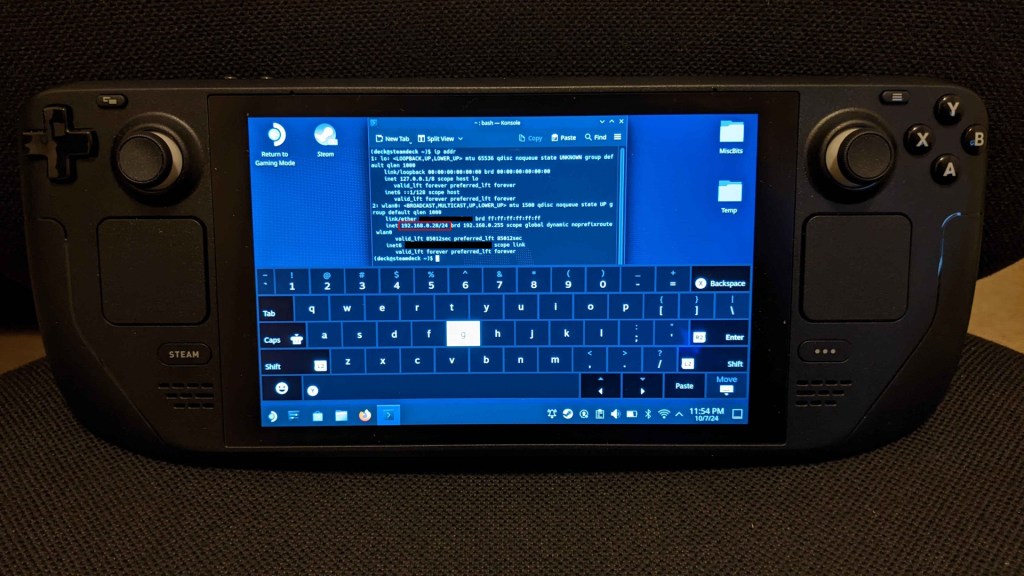
On the deck, open a Konsole and run:
ip addr
Note down the ip address (e.g. in the picture below it’s 192.168.0.28 on my local network).
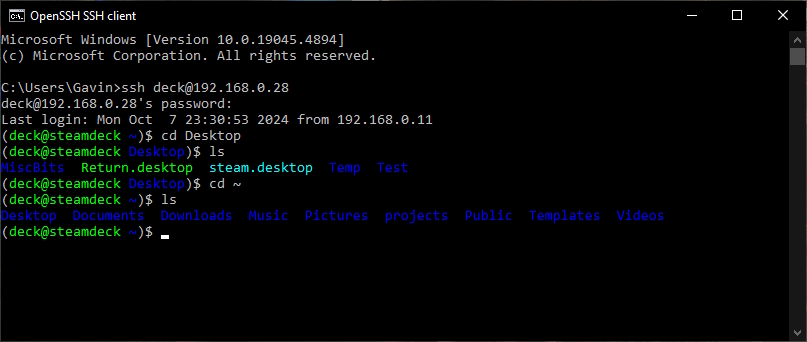
Now you can try to SSH into the Deck from your PC using the following command:
ssh deck@steamdeck
or if that fails via IP, e.g.
ssh deck@192.168.0.28
It should ask you for the deck password that you set up above.
Type it in and it should connect, and you’re all good to go, huzzah!
Try a quick ‘ls’ command and ‘cd’ around a bit to verify that you can see what’s there.
Awesome!
So you can connect to your deck and in theory you can already go ahead and connect your programming IDE of choice to remotely target the machine via ssh, but before you go and do that, we can make the ssh bit a little bit nicer by setting up SSH Keys.
Setting up SSH Keys:
This is an optional step, and is mainly so that you don’t need to put in the password each time that you want to connect, and can just do something like “ssh deck” and have it automatically connect and log you in.
There are several steps to this, and it was something that was a little fiddly as someone new to ssh-keys at the time, so I recommend following and validating each step along the way.
1. First of all, create an RSA key on your PC:
- It’s best to put this into your users “.ssh” folder, i.e:
- “~/.ssh/” on linux
- “%USERPROFILE%/.ssh/” on windows.
- Create the key with the following command
ssh-keygen -t rsa -b 4096 -m PEM- Note the -m PEM bit ensures you get a normal RSA header and not an OPENSSH one (which visual studio won’t like, for remote dev later!)
- It will ask you for a file-name, you can call it whatever you want but I’ll be sticking with the normal “id_” naming convention, so I called mine “id_deck”
- This will generate a private key file called “id_deck” and a public-key file called “id_deck.pub”
2. Now install the generated public key onto the steam deck
2.1: Installing the public key on the deck from Windows:
- Copy the public key over to the home folder on the steam-deck
scp id_deck.pub deck@steamdeck:~/- (where the :~/ bit specifies that the path is “~/” which is the home directory, and of-course you can replace @steamdeck with the ip if necessary as-above).
- ssh into the steam-deck as normal
- Go to the directory where we just copied the public key
cd ~
- Run the following command to list the files and make sure that the file is there.
ls
- If so, then it’s time to copy the contents into the authorized_keys file
cat id_deck.pub .ssh/authorized_keys
- “cd” into the ssh directory and print out the contents of authorized_keys to the console just for good measure to verify it’s there.
cd .sshcat authorized_keys
- We don’t need the id_deck.pub file anymore so go clean that up.
cd ~rm id_deck.pub
2.1: Installing the public key on the deck from Linux
- You can use “ssh-copy-id” to do it in a single step
- By default if you just run ssh-copy-id then it copies the default id_rsa.pub key over. To specify that you want to copy a different key you use “-i” to specify the “identity” that you want to transfer.
ssh-copy-id -i ~/.ssh/id_deck deck@steamdeck
3. Create an alias for this connection on your PC
This is the name that you’re going to use to connect to, e.g. in the “ssh deck” example I gave above, ‘deck’ was the alias I’d set up. I also do the same thing for my Ubuntu vm and I just “ssh linuxvm” into it instead, it’s very handy!
- Go to your user directory (i.e. ‘~/’ on linux or %USERPROFILE% on windows) and then into the “.ssh” folder in there.
- If there’s no file there called “config” (without file-extension) then make one, otherwise we’ll amend it instead.
Inside that file, put the following alias:
Host deck
  HostName 192.168.0.28
  User     deck
IdentityFile c:\Users\Gavin\.ssh\id_deck- For HostName, replace the IP as appropriate (you can even use “steamdeck” (no quotes) if you’ve been having luck with deck@steamdeck connections)
- The IdentityFile path should point to where your private key is, so if you’re on windows and followed the above instructions you’d just have to replace “Gavin” with your own username there.
Note: The first time you connect using this alias and key, it will ask you to confirm that you know the connection, and when you do it will get added to e.g. %USERPROFILE%/.ssh/known_hosts
If the key changes in the future then it may warn of a possible man-in-the-middle attack because the host identifier has changed, if that happens just remove it from the list in known_hosts and save, then reconnect and it’ll treat it as new and just ask you to confirm again.
(E.G. This can happen if you change the sshd_config file, as we will in a later Visual Studio Remote-Connection post… so keep it in mind!)
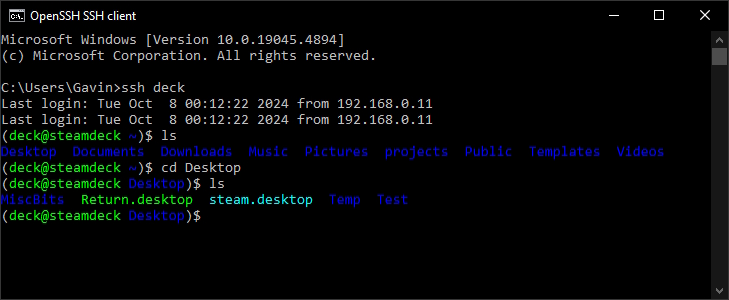
4. Test connecting over SSH using your key without the alias, from your PC in a new command-console:
This is just to verify the key in isolation first.
ssh -i %USERPROFILE%\.ssh\id_deck deck@steamdeck
or from a linux PCssh -i ~/.ssh/id_deck deck@steamdeck
This should just connect it automatically. If you set a pass-phrase when you created the key then it will ask for it too.
5. If that works fine, test connecting over SSH with your alias
The one we set-up above was ‘deck’, so in a new command-console (just to rule out any existing or cached connection bits):
ssh deck
This should just connect automatically, and if you set a pass-phrase when you created the key it will ask for it too the first time.
SUPER! You’re all set-up at this point with SSH keys, which just makes it a bit easier to ssh into the kit each time… plus you learned something useful in general for ssh stuff (used for a whole bunch of things!)
Let’s try to compile something on-deck!
Now I’ve verify deliberately put “try” there, because this is going to fail (and that’s expected at this point), but in doing this we’ll set up our quick test to verify future install steps.
First of all, let’s quickly create a test hello-world code file called test.cpp, which we’ll put on the desktop of our steam-deck inside a Test folder, all of which we can now do via a terminal with the following commands!
ssh deckcd Desktopmkdir Testcd Testtouch test.cpp
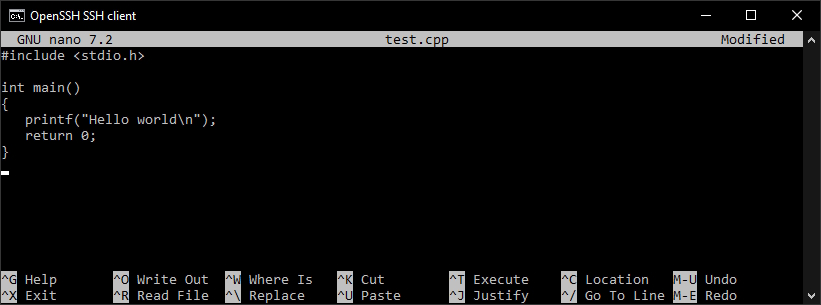
And now you can just use ‘nano’ via the terminal to edit the contents of that file.
nano test.cpp
Type in the example hello world program, e.g:
#include <stdio.h>

int main()
{
	printf("Hello world\n");
	return 0;
}
Or how it would look in nano:
Press Ctrl+O to “Write (O)ut to file” (save) and when it asks you for the filename just leave it as test.cpp and press enter.
Press Ctrl+X to “e(X)it” nano.
If you wanted to verify that it all went well and saved correctly then you could “cat test.cpp” to print the contents to the console.
At this point, it’s time to try and compile our test program
(NOTE: For this post I’m going to just command-line compile it while we’re getting up and running, but in future posts we’ll be doing cross-compilation from Windows using Visual Studio, so if the command-line compilation stuff puts you off, don’t sweat it too much, but you can also use any other toolchain that you’re used to once you can connect it via ssh).
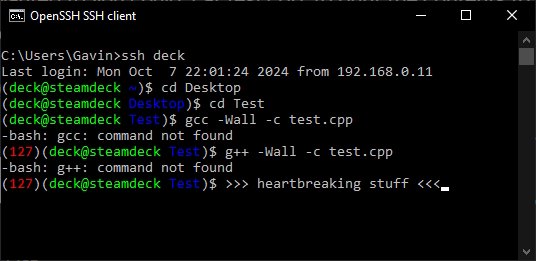
Let’s try with gcc:
gcc -Wall -c test.cpp- “-bash: gcc: command not found”
No luck huh, what about g++ ?
g++ -Wall -c test.cpp- “-bash: g++: command not found”
… oh no, heartbreaking stuff!!
So perhaps not unexpectedly (because most users don’t need it), the Steam Deck doesn’t come with a C++ development environment set up by default.
In the next post, we will remedy this, setting up the necessary development environment so that you can compile and run programs natively on the deck, and then we’ll come back and compile that test program for real!
See you over there!

Leave a comment